Didgeridoo Stand
The first Cut is the deepest… unfortunately it needed an Accident before I finished my Didgeridoo Stand.
You better act before…
Why I realized the Project
Well, I startet playing didge more or less recently. So why should I have a stand? The few instruments I own perfectly stay leaning on the wall, don’t they? Okay… from time to time a dificult situation arises. A son of mine grabs an instrument an places it back carelessly. For example.
Or making up the room leads to critical situation as well…
Lukas, visiting me from time to time to show me new things, already mentioned it could be dangerous to have them leaning on the wall. Of course, but to be honest I did not find a stand I like on the internet. And I am good at research. I do not want them horizontal on the wall. Looking good, but unflexible. And all the humidity after playing can not realy leave the instrument…
But I needed to experience it myself. The O’ Meara-E (sorry Tristan) fall over towards the desk. Just about 40 cm, but enough to damaga the coating a bit.
Next day I ordered material to make a stand.
Time and Material to build the Didge Stand
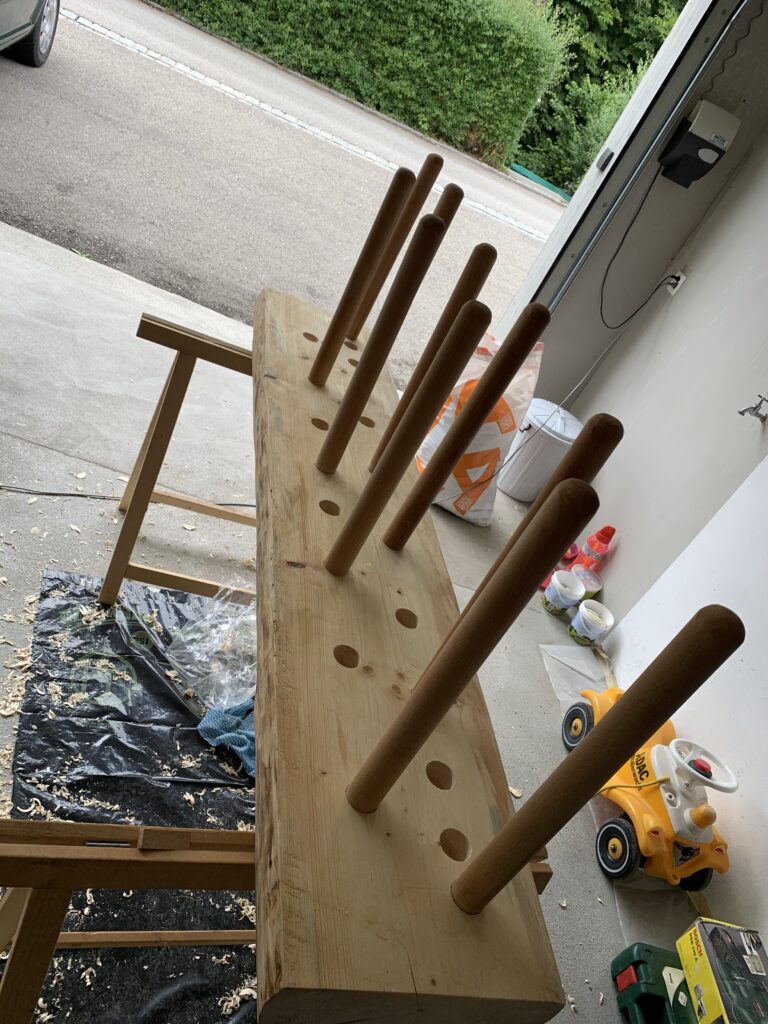
- A lengthways cut spruce tree trunk from the local forester. 160 cm long, about 32 cm width and a good 10 cm of thickness. Then cut again tobecome two parallel sides.
- Five one meter beech logs, 40mm in diameter
- Drilling machine and drill stand
- Suitable grinder
- 40 mm Forstner bit
- Screw Clamps
- Linseed oil
- About 8h of time
Obviously this has to be adapted to your own project.
Work Instructions Step by Step
- Make a drawing true to scale
- Where do you want the didgeridoo stand?
- How much space can you use? Do not forget to consider the height as well: 2 meter instrument and .6 meter stand can become a difficult combination in a room of 240 cm standard room height
- How many Instruments do you build for?
- Do you want flexibility in placing the sticks on stand?
- Consider the WAF.
- Gather the Material
- As usually I did not think through the whole project from the beginnen but startet too early.
- So I had the one or the other unwanted break, e.g. for getting other tools (Thanks you Hans for helping me out again).
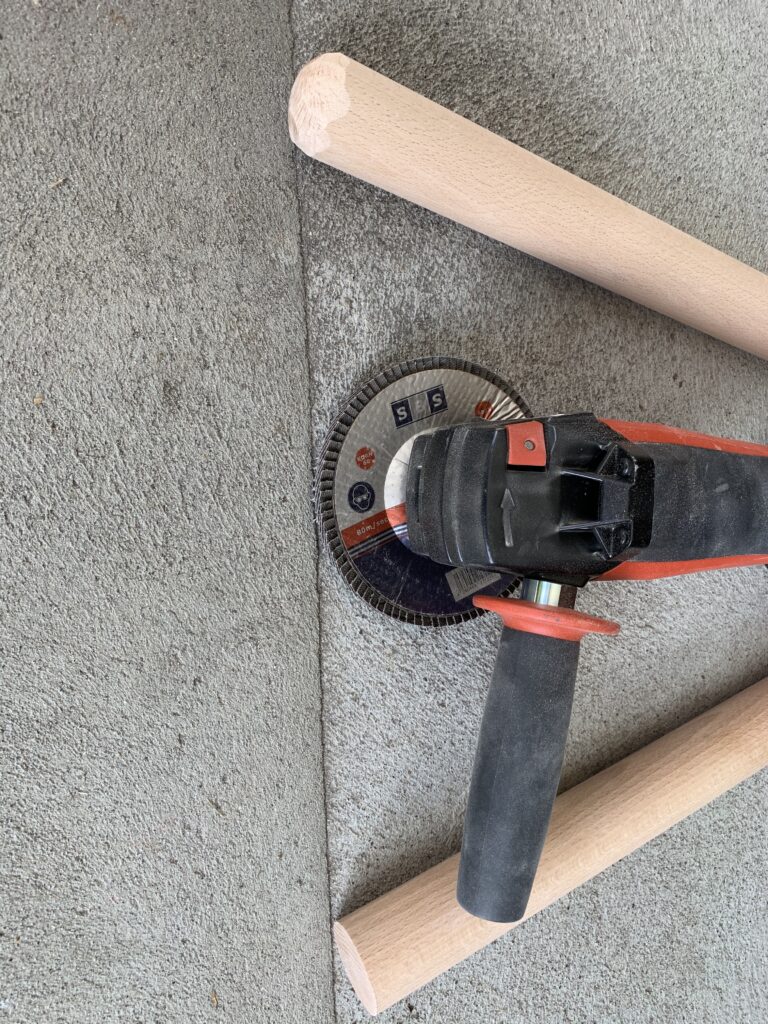
- Grind the tree trunk (if necessary)
My came rough sawn from the forester. Has it’s own charm, but I wanted more delicate. I used an angle grinder for the first cut and an orbital sander for the second, down to 120 grid. good enough for me.


4. Transfer the drawing to the trunk:
- Where do you wand to place the wholes for the logs? Any specific pattern?
- Validate if your idea gives you enough space between the didges. I used a circle to draw the wholes and the diameter of the didges bells on the trunk.
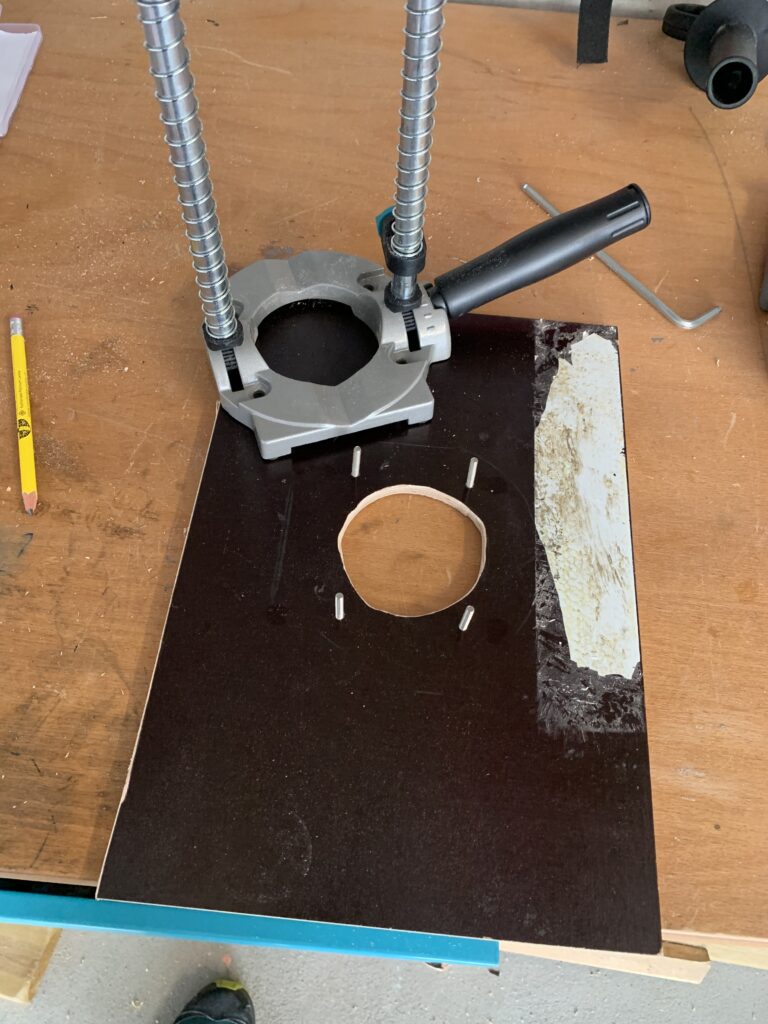
5. Drill the wholes:
- I tried this in another piece of wood “free hand” with a 40 mm Forstner bit. (Do not take a cheap one. Quality matters here!) Did not work at all. 5° angle and the wholes became too big…
- So I bought myself a drill stand to make an 90° angle. The drill stand I fastend by screw clamps what resulted in footprints of the stand in the trunk… So I made myself a solid plate which I screwed unter the drill stand, making it easy to fasten the stand on the trunk – with no prints…
- If you can, use a vacuum cleaner taking up the chips while drilling: do it.
6. Fit in the logs
- It is unlikely the logs will fit immediately. If you worked accurately it the wholes are quite precise and the logs will fit by hammer – if at all.
- If you want to change the logs in future to be more flexible in placing the instruments you probably have to grind the ends of the logs a bit to fit them into the wholes.
7. Finish
- Maybe you want some feet unter the stand to save the floor.
- As the stand and the logs are confronted with some humidity you definitely want to oil both. I used linseed oil as I use for kitchen furniture, too.


Grinding & sanding the logs top
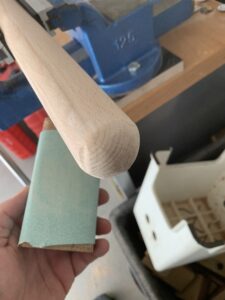
This end will contact your instrument from inside. You want it to be smooth.